For many years, I claimed to be a strict savory breakfast eater. No pancakes for me. No waffles. No French toast. No funny little Danishes. No, thank you. I’ll take eggs, I’d say. Give me an omelet any day. And more bacon. And sausage.
I stand by my love for the saltier breakfast fare, but I admit that a taste for the sweet has crept in there. And in the case of these Belgian waffles, perhaps more than crept. Maybe more like stormed in with the sound and fury of the first ten minutes of a Michael Bay movie.
It’s important to note that I included the nationality “Belgian” in the description of these waffles. I mean, an ordinary waffle is nothing to stop traffic for. A pancake, unless packed with extra love and ingredients (see the husband’s Orange Ricotta Pancakes), is tasty but not remarkable. French toast is, too often, just some eggy bread. But those Belgians were onto something. They’ve taken an ordinary breakfast bread and, er, waffled it, expanding the possible crispy delectable surface area by multiples. It’s crispy, yet fluffy and soft. It’s caramelly and yet also complex. It’s fragrant and, yes, oh so seductive. Still more fiendishly, it has these generous square cups to hold syrup or trap dainty pieces of fruit or puddles of ice cream in. Is genius too strong a word? I think not.
How did this love affair begin? When we encountered some outstanding Belgian waffles at a local restaurant one evening as a dessert item. Granted, I was nine months pregnant and out for the rare dinner without a two-year-old, so that might have made them extra delicious. But the husband’s reaction was even more mighty (and, let’s face it, predictable). He ran right out and bought himself a Belgian waffle iron (natch) and set to work trying to replicate said waffles. After several batches of subpar waffles – which I managed to force down – this recipe emerged.
Is it worth it? Is it worth wrangling with those yeastie-beasties? Waiting an hour for the batter to “develop flavors”? Worth buying a freakin’ Belgian waffle maker? I can only speak for myself. And the answer is: Yes, indeed, and please pass the waffles.


And now, the Husband’s take…
I know, you’re thinking, “Waffles are easy.” And if you just whip together commercial pancake mix, then you’re right. These waffles are something else. They’re more like a “gateway drug” to interesting culinary possibilities. You see, these waffles eschew chemical leaveners like baking soda and baking powder. Instead, they gain their volume and gusto from a combination of whipped egg whites and slower acting yeast.
Wait, wait… I know what you are thinking: Yeast is a microorganism that should be left in the hands of serious bakers. But, think of the potential magic to be unlocked. The yeast provides not only volume, but also delicious taste. It provides the tang of fermentation that makes these waffles serious contenders for glory. While they are a great breakfast/brunch food, they are also great for dessert with a little ice cream or even just nude as a snack.
In addition, if you get hooked on these waffles, you just might find yourself experimenting with other tasty, yeast-oriented projects… like donuts, bagels, country loaves or those crunchy, crusty French baguettes. The possibilities are really endless once you make friends with yeast. You just might become an addict.
Before I go, just a little note. These are not quick-to-make waffles from the back of the box. I typically make them for weekend brunch or as a dessert for a party. The big reason is that you need some time to let the flavor develop. So, either begin the process early in the morning or start the night before, refrigerate the batter and then let it warm back up on the counter an hour or two before you make the waffles. In any case, you will be incredibly well rewarded for a little patience.


Belgian Waffles
Ingredients:
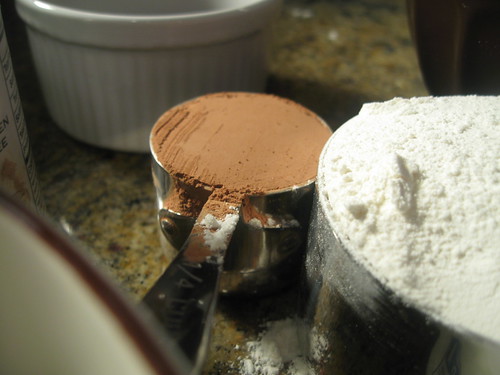
2 cups all purpose flour
1 3/4 cups milk (warm or room temperature)
4 egg whites
2 egg yolks
¼ cup sugar
3 tbsp. melted butter
1 tsp. rapid rise yeast
1 tsp. vanilla extract
½ tsp. salt
Directions:
1. Let the milk come to room temperature, or warm it. This is important because the yeast will not be getting the classic bloom you see with bread recipes.
2. In a large bowl, combine the flour, yeast and salt (dry ingredients) and whisk to integrate. In another bowl, combine the milk, sugar, melted butter, and vanilla and whisk until homogeneous (wet ingredients). Finally, in a third bowl, whisk the egg whites to stiff peaks.
3. In the larger bowl, combine the dry and wet ingredients until they just come together. The mass should be relatively dense and very sticky.
4. Fold in the egg white in three stages. In the first stage, you can be a tad bit rougher as the moisture of the whites will make the mixture more workable. In the next two installments, simply work the whites in just enough as to bring the mixture together and ensure there are no large portions of whites. You don’t want to overdo this step. We want the air and moisture to integrate well.
5. Let the batter rest covered on the counter for a minimum of 1 hour. If you take more than 3 hours, move the batter to the refrigerator. The batter should expand significantly (double) and may require a stir to keep form overflowing if the bowl is small.
6. Ensure your waffle maker is as hot as possible before pouring on the batter. Cook until the waffles reach a golden brown. Serve as desired.